
Manage your blog with docker and rancher
- docker
- metalsmith
- rancher
- letsencrypt
I finally followed the advice of my smart co-worker, and now use docker to manage this blog. I'm so happy with the result that I wanted to share the process in this post.
Why use docker ?
I wanted to be able to publish new articles simply by pushing to the git repo of my blog. Previously I would create a simple python or ruby service, and call it with a github hook when a new article is pushed. Though it's a perfectly valid, it's still too much work for such a simple need, isn't it ?
Actually I'll show you how you can run your blog with only docker installed on your server.
How to install docker
If you chose to go with rancher, be aware that you would have to install a supported docker version. Rancher's site lists them here.
At the time of writing, version 17.06 of docker is supported, but official docker installation script is broken for fedora !
curl https://releases.rancher.com/install-docker/17.06.sh | sh throwed the error :
dnf makecache: error: argument timer: invalid choice: 'fast' (choose from 'timer')
So that I had to edit install script with this version.
Basically it only adds docker entries in your yum repositories.
Install correct version of docker with sudo dnf -y install docker-ce-17.06.0.ce-1.el7.centos.x86_64
Make sure docker will be excluded from updates by installing versionlock and using it :
sudo dnf install 'dnf-command(versionlock)'
sudo dnf -y install docker-ce-17.06.0.ce-1.el7.centos.x86_64
How to use docker
I use metalsmith to generate my blog, but I guess you can adapt this architecture for any other static site generator.
- I created a docker image of my blog, and pushed it to docker hub.
- Everytime I push something to my git repo, the docker image is updated
- On my server, rancher is in charge of managing and orchestrating the various images needed to run the blog (the blog image itself, as well as nginx to serve it). When the image is updated in docker hub, rancher downloads it and updates the blog.
Create a docker image for the blog
I only need docker and git locally installed. The code of my blog is in a github repo : https://github.com/landrysoules/spaceinvade.rs.
Creating a docker image is quite trivial, we only need to add the following Dockerfile at the root of the project:
# Dockerfile
FROM node:wheezy # This base image is quite heavy, but contains all we need to make metalsmith work flawlessly.
COPY . /blog/ # Copy everything from project directory into `blog` folder in docker image, excluding what's defined in .dockerignore
WORKDIR /blog

RUN yarn install

EXPOSE 3000 # Port exposed in docker managed network
CMD ["node", "index.js"] # Command executed when image is ran
We also need a .dockerignore file, also located at the root of the project :
# .dockerignore
node_modules
npm-debug.log
build
src/content/drafts
This file will tell docker which files should be excluded from the image.
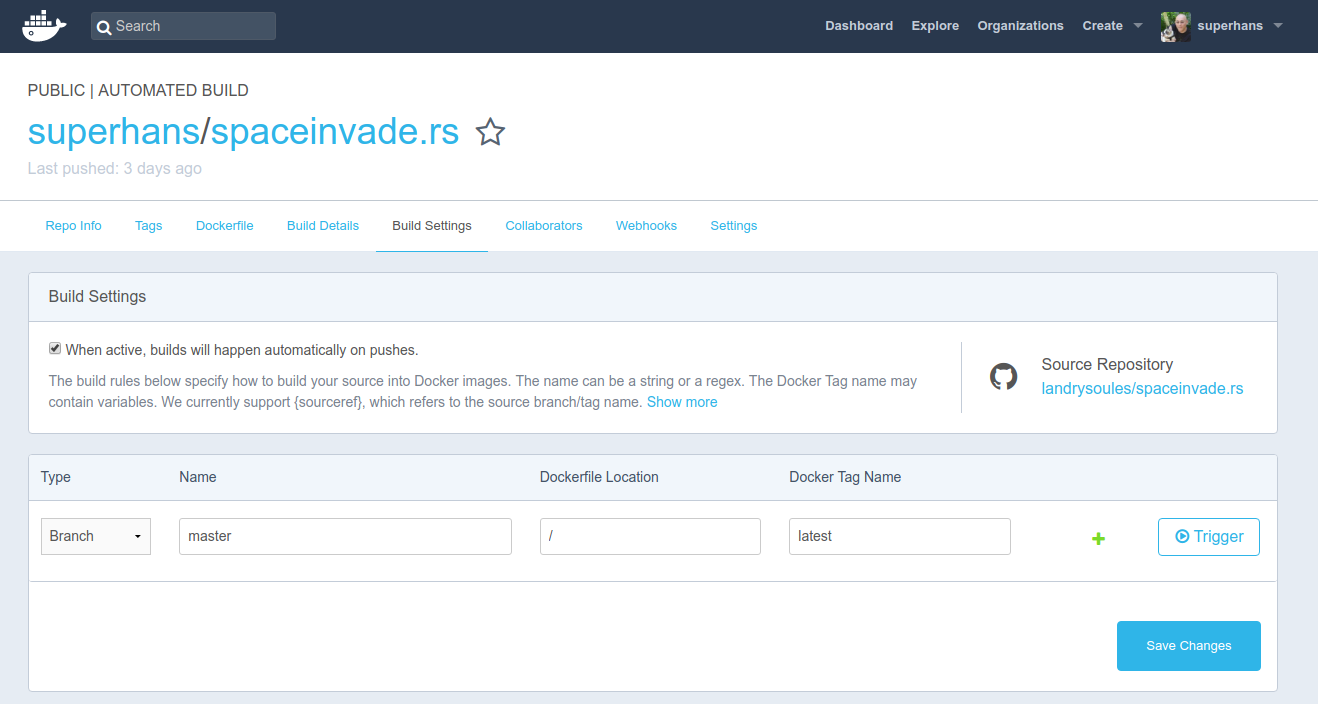
Build and use the image
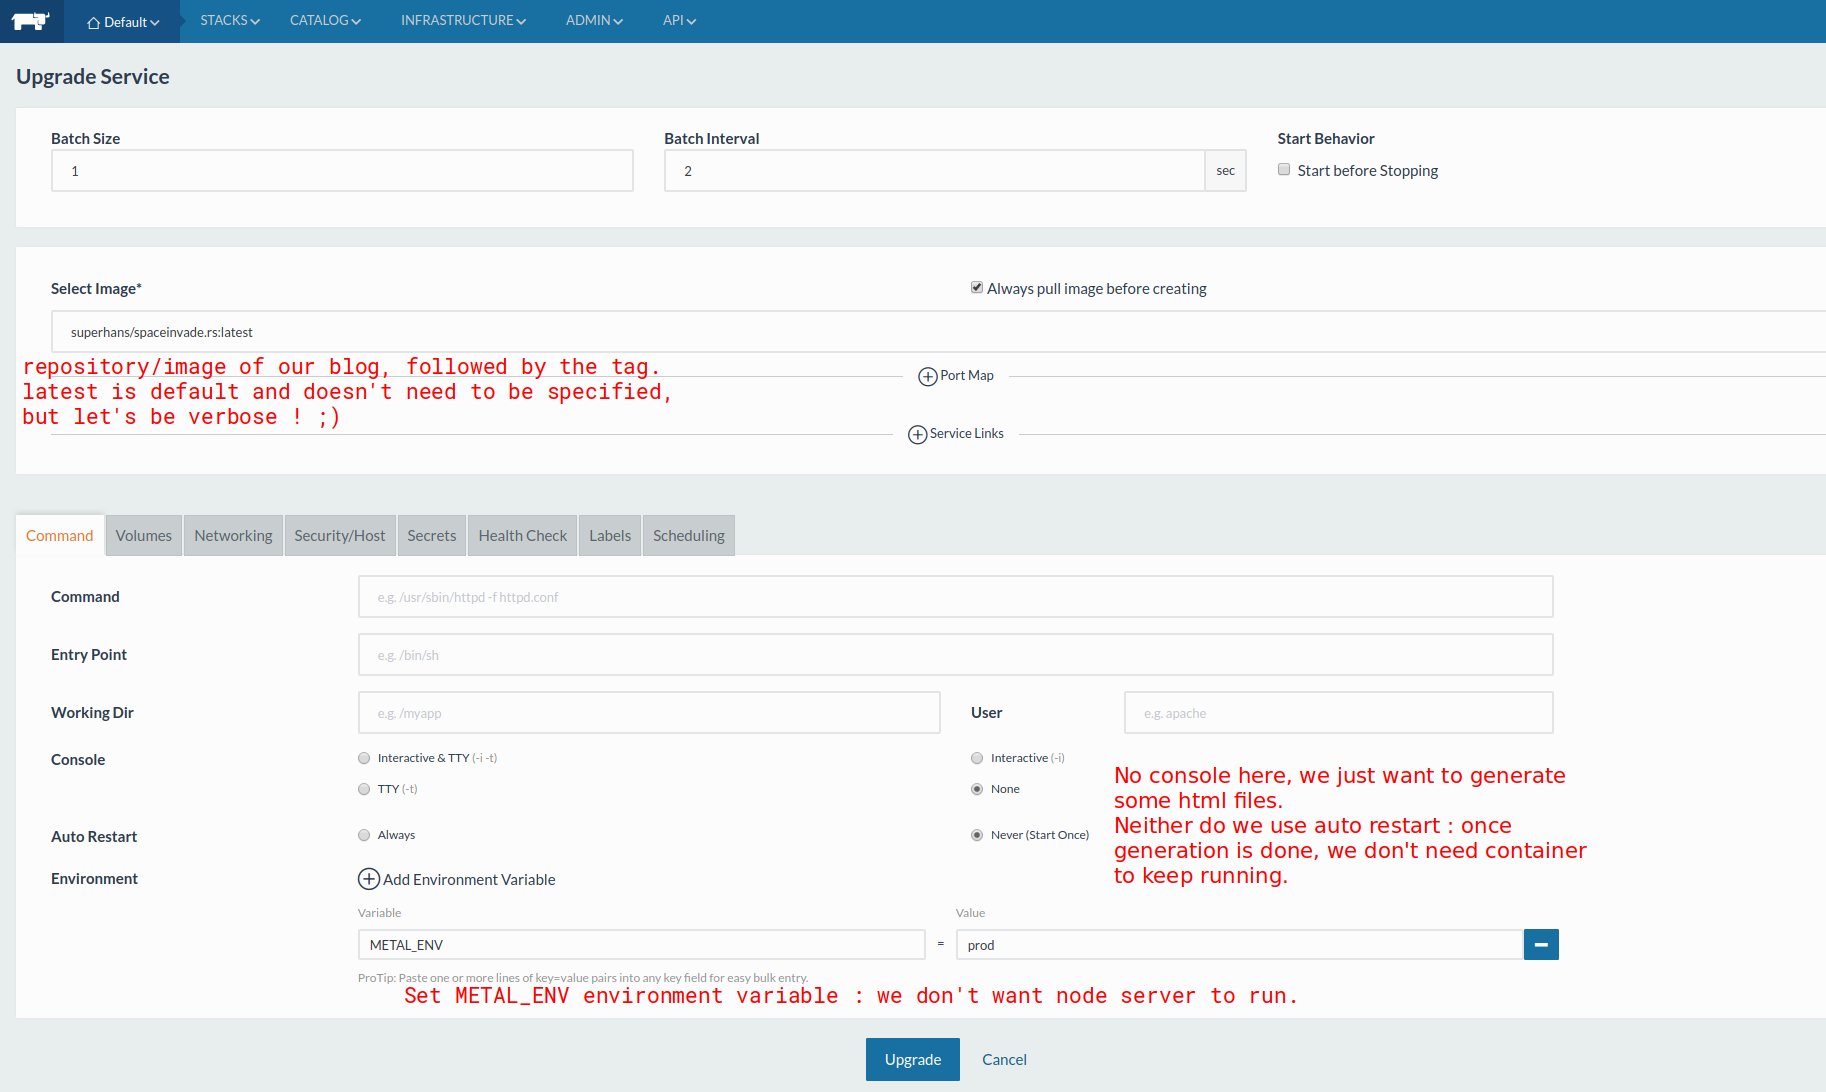
Everything's in place, I can build the image.docker build -t superhans/spaceinvade.rs .
Run it with :docker run --rm -p 3000:3000 -v "$(pwd)"/src:/blog/src:z superhans/spaceinvade.rs
I couldn't have the volume work correctly without z parameter, due to SELinux restrictions.
This command will generate the static site and launch it through node server and browserSync, which is exactly what I need during dev. Production is a different story though, since I need only website generation then. I achieve this by setting METAL_ENV global variable :docker run --rm -e METAL_ENV=prod -p 3000:3000 -v "$(pwd)"/src:/blog/src:z superhans/spaceinvade.rs
Next step is to finally push this image to docker hub. Of course, a docker hub account is required.
First run docker login, then docker push superhans/spaceinvade.rs.
As Fedora has its own docker registry, I had to first remove all repos related to fedora/redhat from /etc/containers/registries.conf in order to make it work.
Server preparation
Maybe the best part : now that I use docker, the only thing I need to install on my vps (recently switched to contabo and more than happy with them) is docker !
Here you have multiple options :
I decided to use rancher, basically because I found it easier to install, and never looked back, since it's so powerful and intuitive to use.
Rancher installation is really well explained in the official doc. Just make sure you install the officially supported version of docker : I stupidly installed the latest, and experienced weird results!
I installed both rancher server and host on the same vps : it's not the recommended way, but I have no better choice since I have only one vps...
As for the ports needed to be opened : I had to restart my vps after changes in firewalld to make it work.

Rancher basic setup
After successful installation, fire up your favorite browser and go to http://<your domain>:8080. Rancher alerts you that you should define an admin user. You can use basic password protection, or github authentication, which is really well integrated.
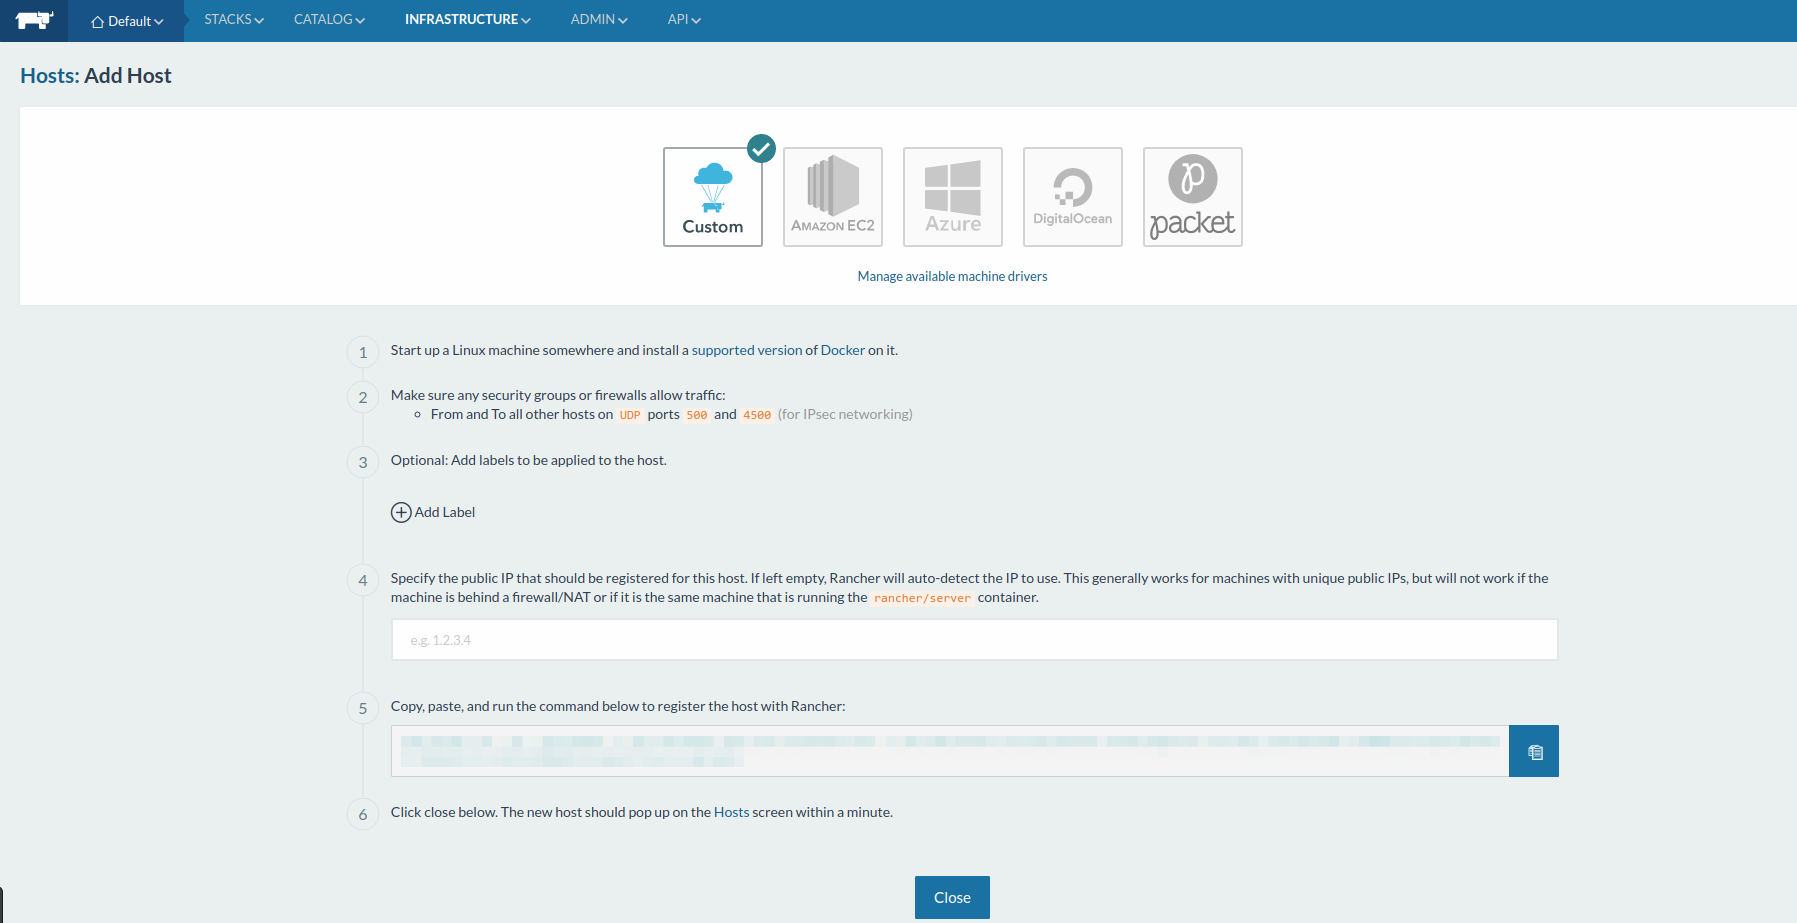
Add a host
Next step is to add a host, which will run our images. Various options are available, but for a vps we'll chose custom host. Just carefully follow the instructions and you're done.
Deploy the blog, with SSL certificate
I always found ssl certificates painful to deploy on servers, in addition to be expensive. Thanks to letsencrypt, you can use trusted certificates for free, in an easy way. And the good news is that it's perfectly integrated with rancher. Here I create a dedicated stack that will contain everything related to spaceinvade.rs. I'll need:
- the blog service, from the image generated earlier
- nginx will be used to serve the website
- redirect will reroute all http traffic to https
- loadbalancer is the rancher official load balancer. It will serve as a front server, and will allow us to create routes

Letsencrypt setup
Letsencrypt is available in rancher catalog, and will use its own stack.
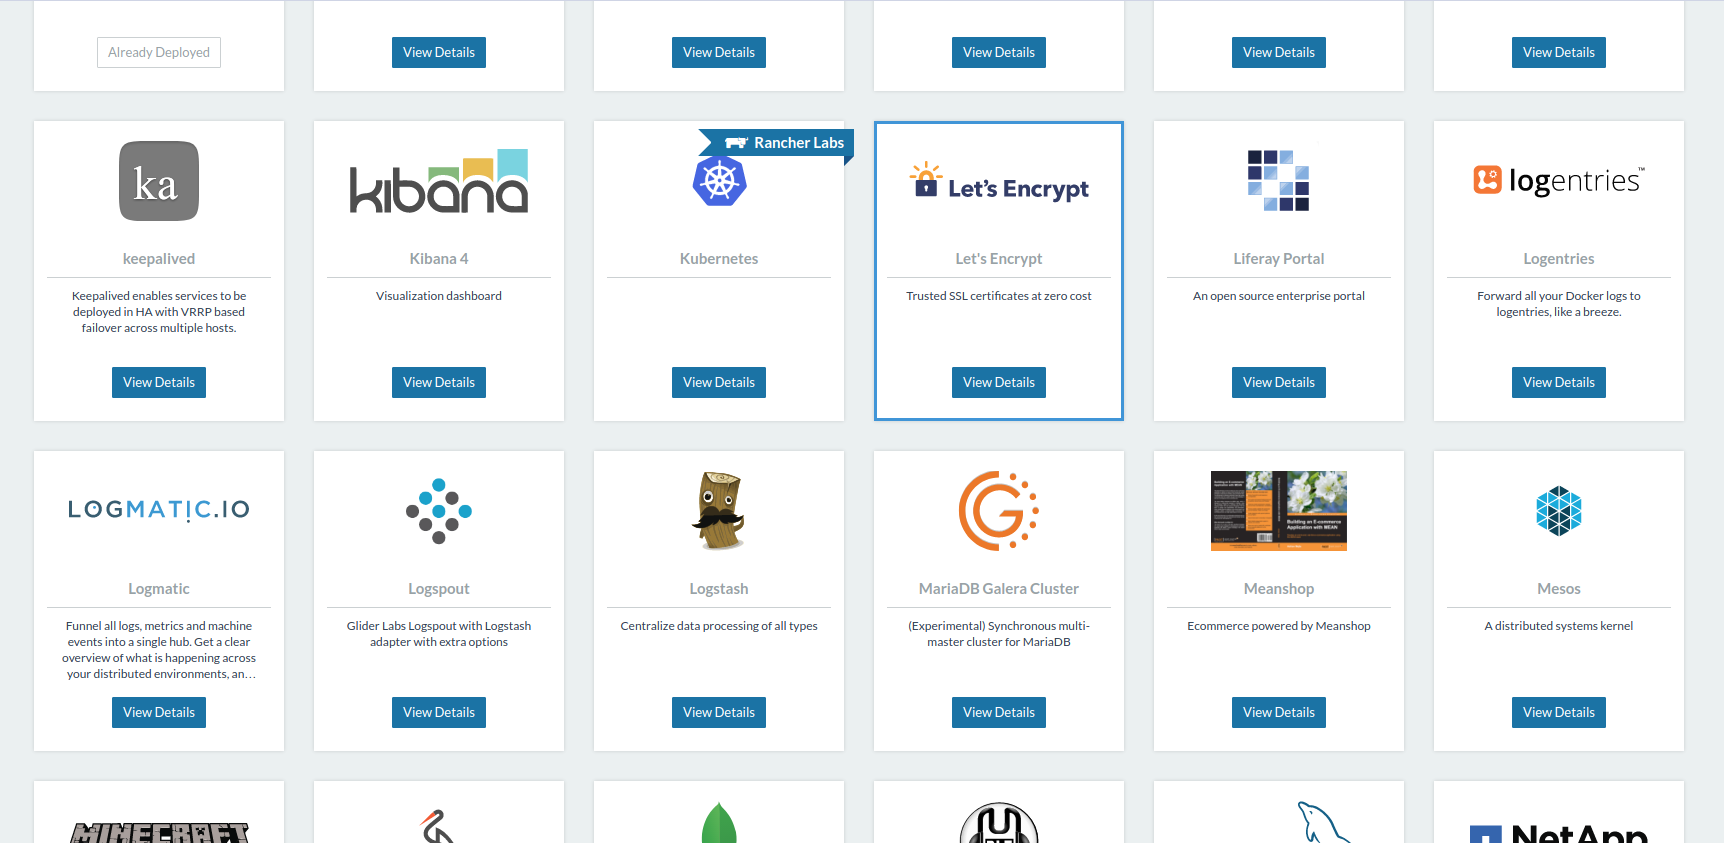
Select it and follow the instructions. You can use your provider's api if it's listed, otherwise you'll have to use http check.
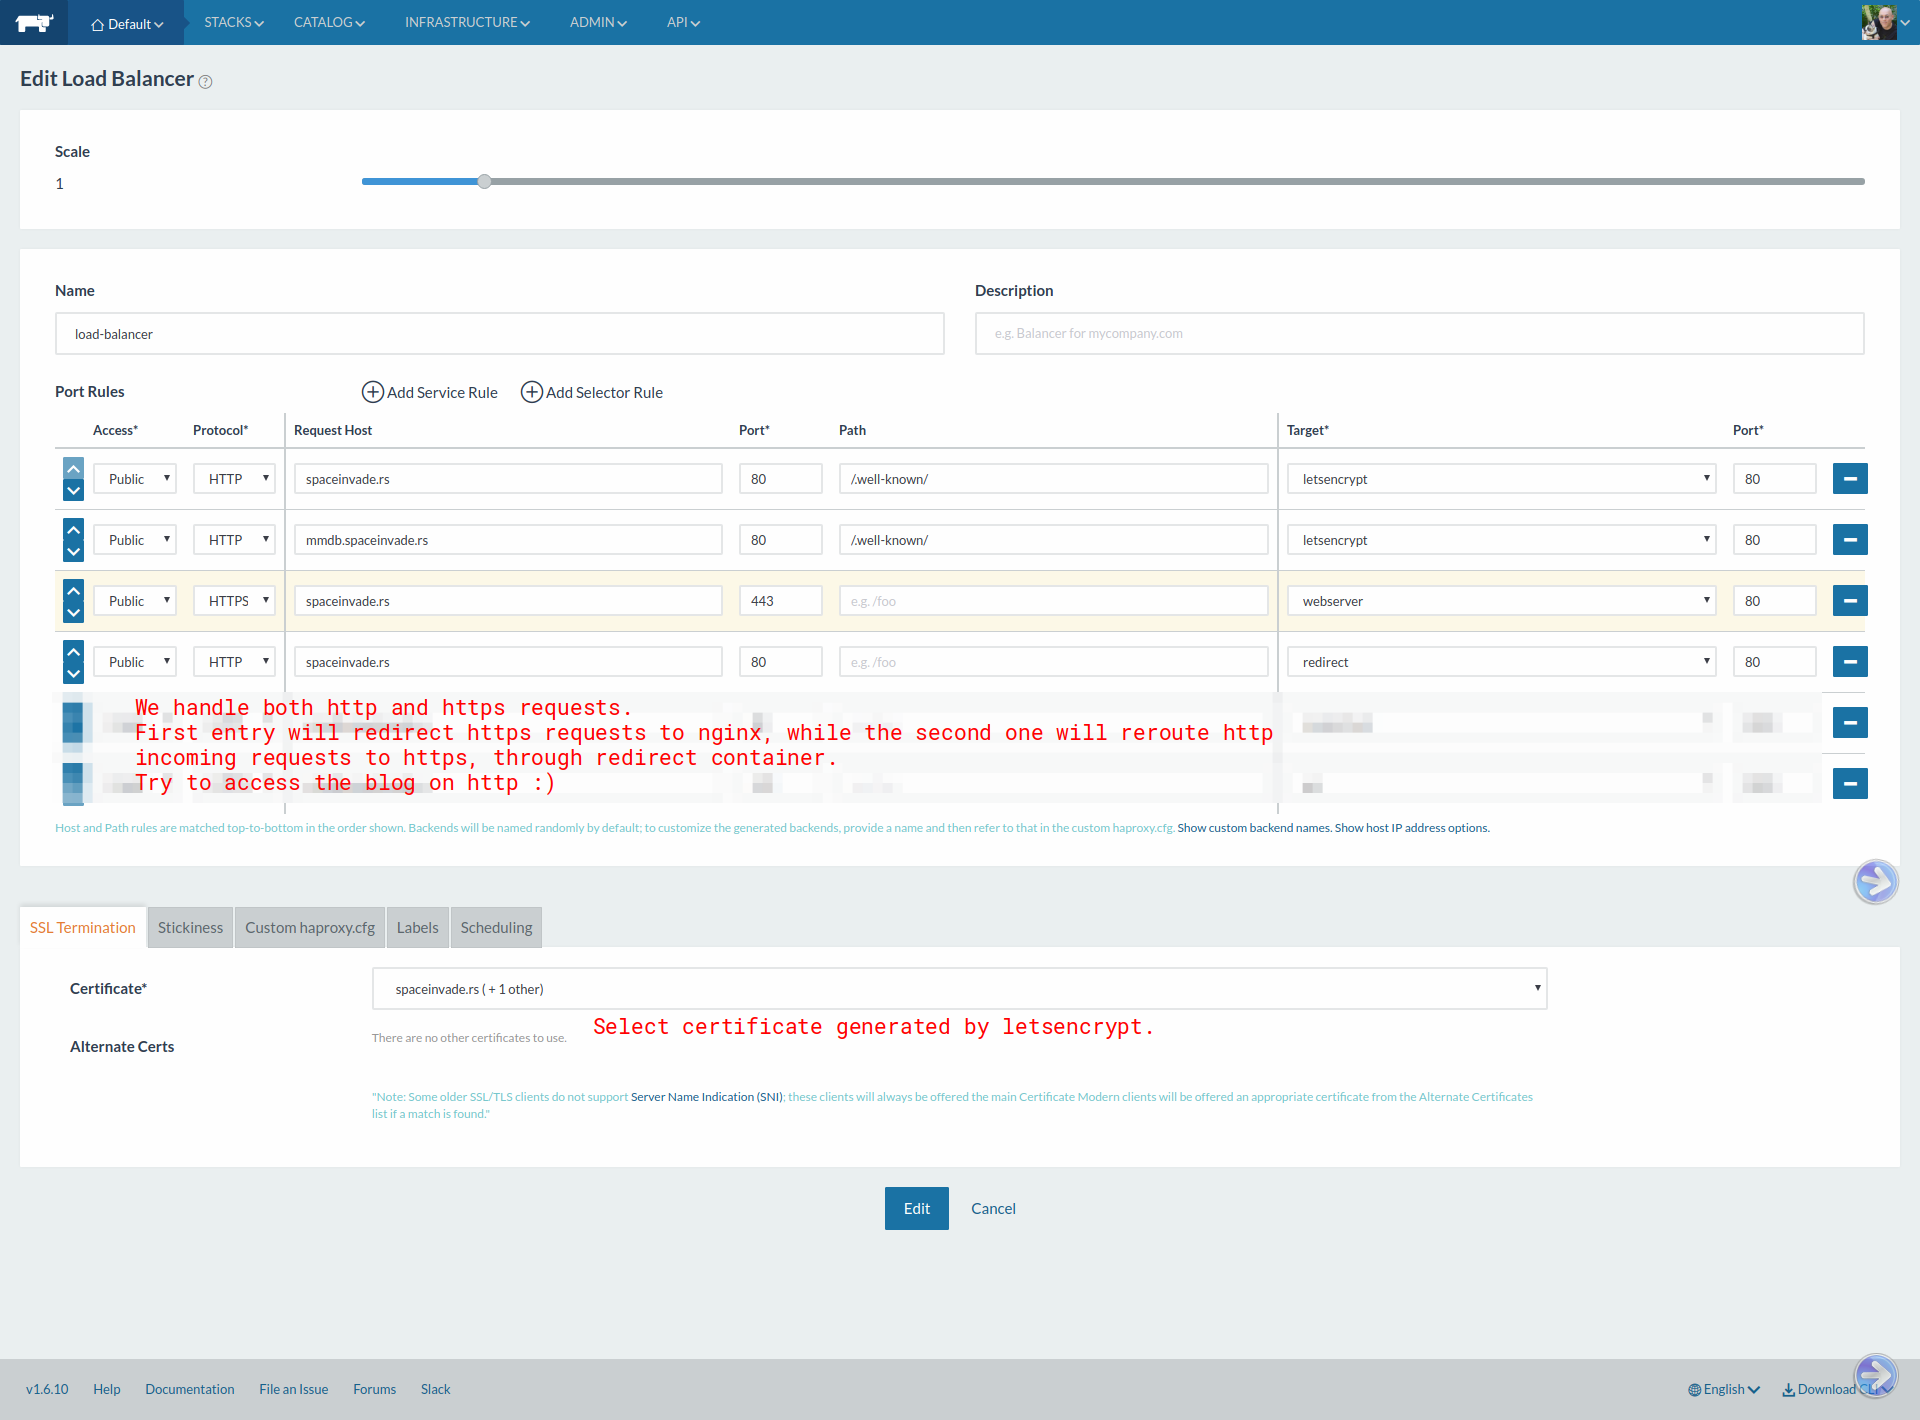
Then edit your loadbalancer service and add as many service rules as you defined domains/sub domains in letsencrypt. They must be the first rules (on top of anything else):

After a couple minutes, your brand new certificate will be generated and available in the corresponding section :

It's now visible for all your stacks, and ready to be used by loadbalancer !
spaceinvaders stack in detail
Now that letsencrypt is running, let's review the various services :
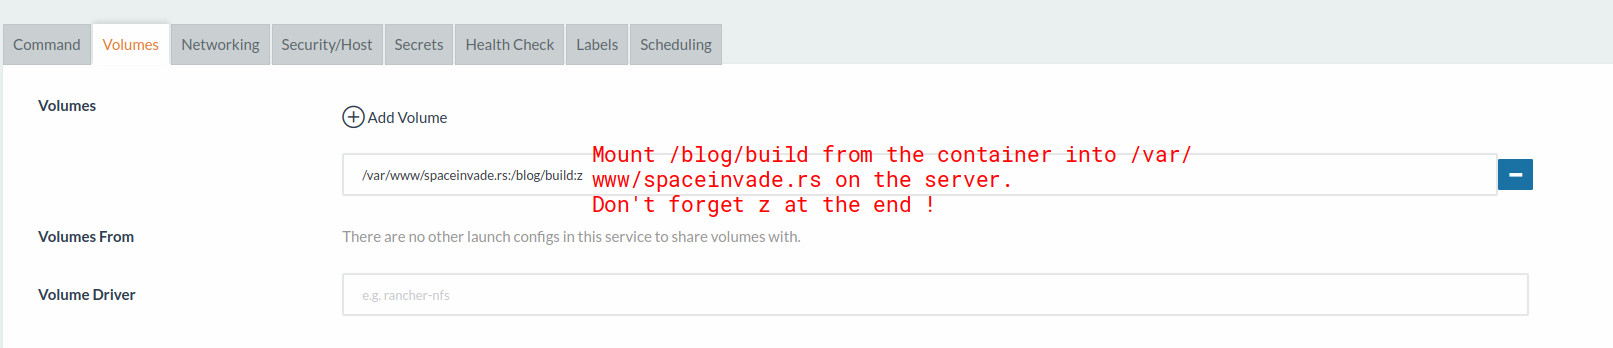
spaceinvaders
Tags are used by rancher to identify services. We'll create service_name to later trigger auto upgrade.

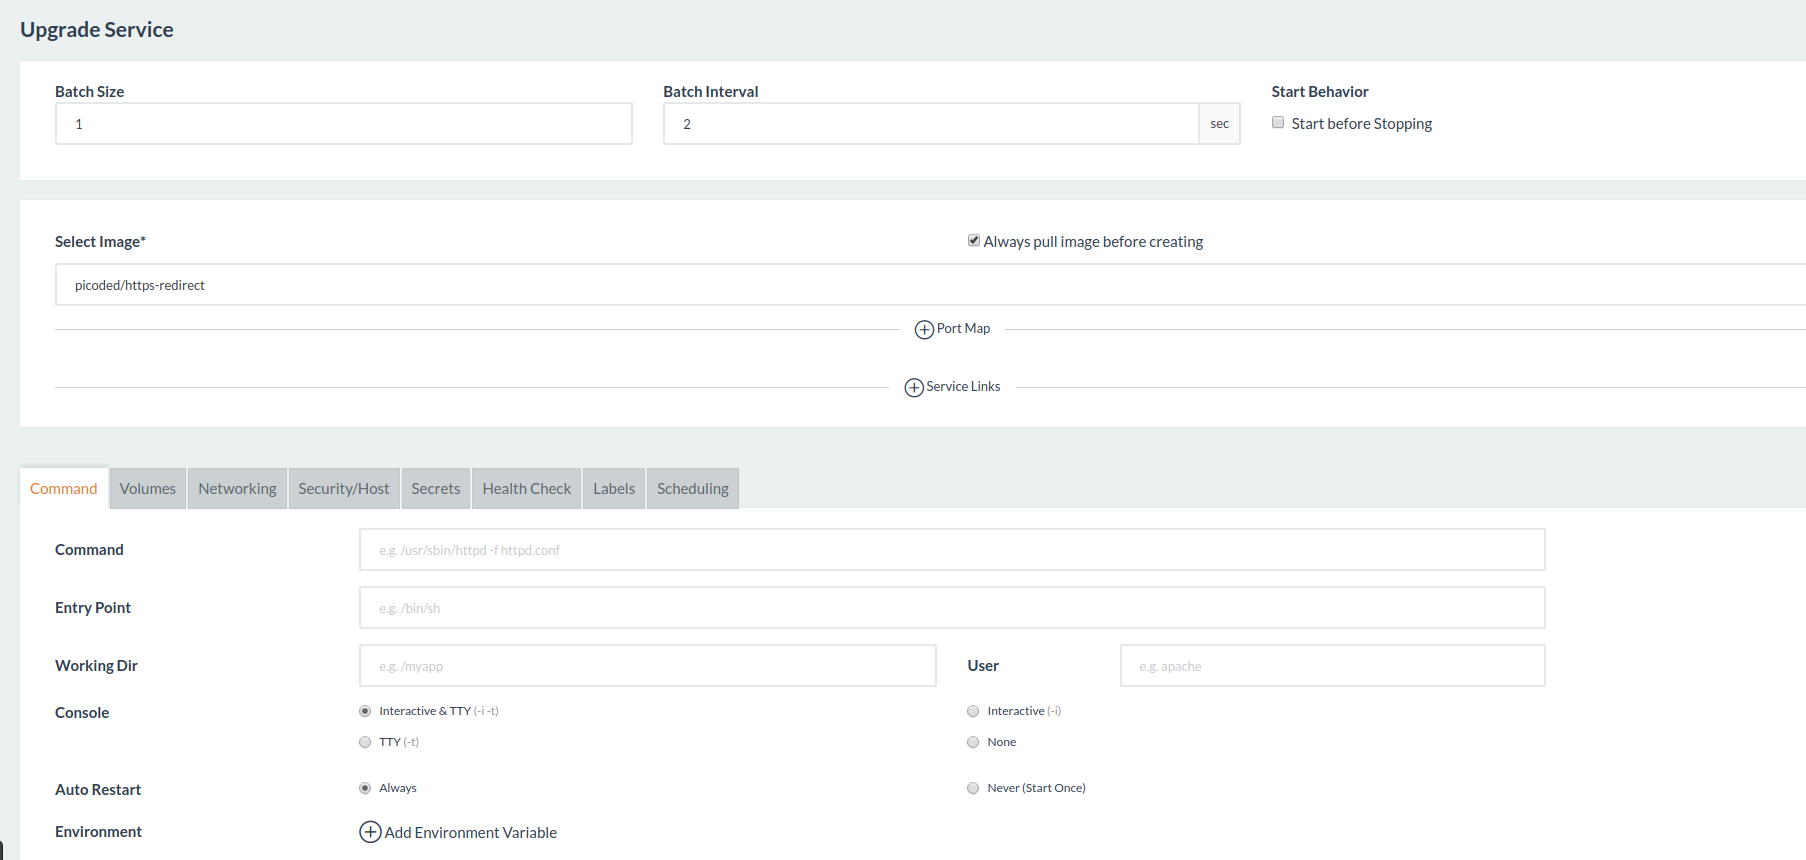
nginx

redirect
No configuration needed for this one, just leave everything default.
loadbalancer
Automatically update the blog
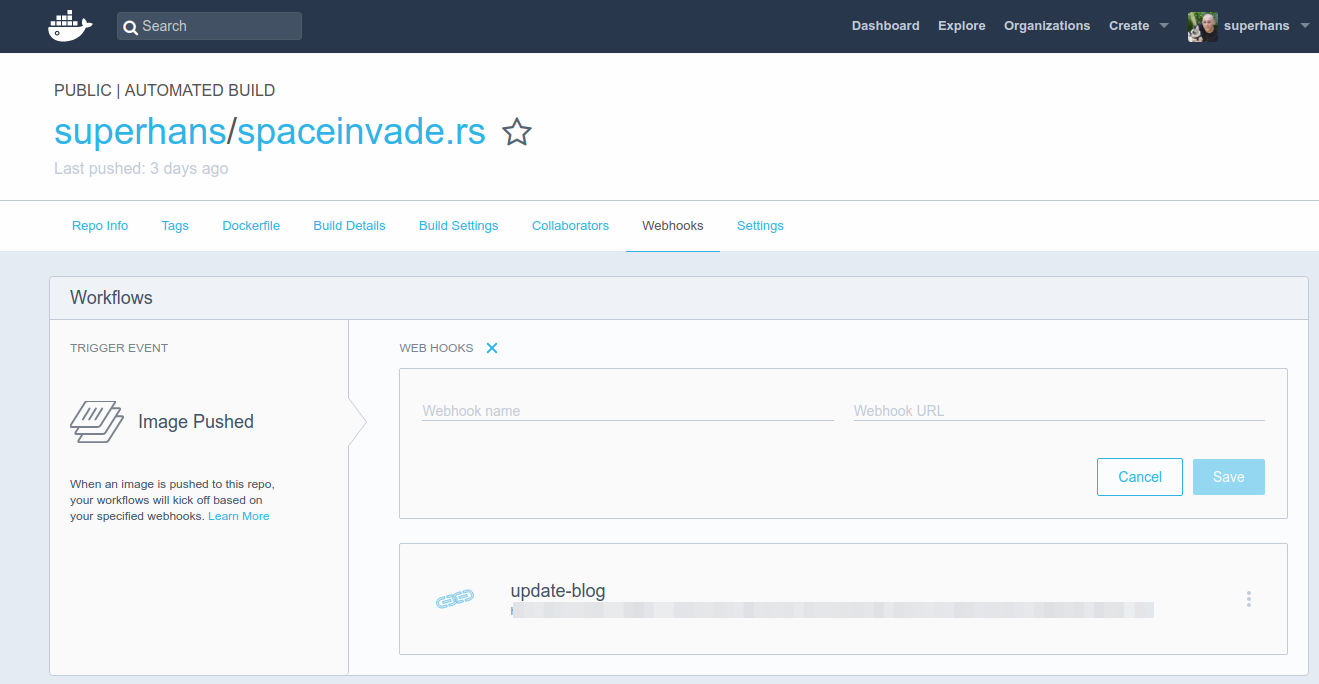
Now comes the rewarding part ! Everytime I push a commit into master branch, github will make a docker hub API call to rebuild the blog's image, and when done, docker hub will call my server's rancher instance to upgrade the container.
Here is how it's done :
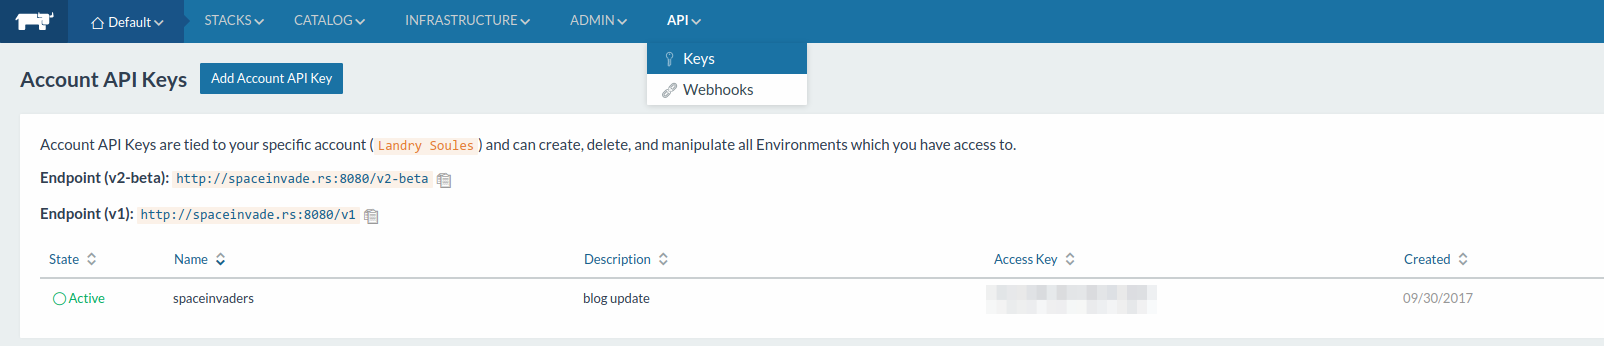
Generate an API key in rancher
Create a URL to trigger service update

Rancher has now generated the url we'll call from docker hub

Call service upgrade from docker hub
Of course, we use the url generated previously by rancher.
Start image rebuild when a change is pushed to github
Feel free to get in touch if something doesn't make sense !